
For years, I’ve watched countless bloggers chase fleeting trends on social media, pouring energy into platforms that deliver temporary highs and little lasting impact. But then there’s Pinterest. This platform is different. It’s not just another place to share pretty pictures. Not even close. Pinterest, in my expert view, is an absolute powerhouse for driving consistent, long-term traffic to your blog, a search engine masquerading as a visual discovery tool.
I believe any serious blogger, regardless of niche, is missing a trick if they aren’t actively harnessing Pinterest’s unique power. It’s a content discovery platform with a loyal, engaged audience actively looking for ideas, solutions, and inspiration. Your blog content fits right into that. Let’s build your presence.
Why Pinterest is a Game-Changer for Bloggers
Forget what you think you know about “social media marketing.” Pinterest operates on an entirely different wavelength. It truly stands apart.
Pinterest as a Visual Search Engine
Think Google, but visually driven. That’s Pinterest. Users go there with intent. They’re searching for “healthy dinner recipes,” “DIY home decor ideas,” “how to start a blog on Pinterest”—exactly the kind of content your blog likely produces. This isn’t about viral shares that vanish in a day; it’s about evergreen content being discovered months, even years, after you publish it. This alone is transformative.
Driving Long-Term Organic Traffic
This is where Pinterest truly shines for bloggers. Unlike platforms where your content has a short shelf life, pins can live on for ages, continuously funneling visitors back to your site. I’ve personally seen pins from years ago still bringing in consistent clicks. It’s a slow burn, yes, but its compounding effect is incredibly rewarding. For more general strategies, you absolutely must explore How to Drive Traffic to Your Blog: 10+ Proven Strategies.
Audience Demographics and Niche Relevance
Who uses Pinterest? Predominantly women, but men are joining rapidly. More importantly, it’s a demographic often with disposable income, making buying decisions, and planning for the future. Whether you blog about fashion, food, finance, parenting, travel, or education, your audience is likely already there, actively seeking your expertise. Finding your niche on Pinterest is often easier than on other crowded platforms.
Beyond Social Media: A Content Discovery Platform
It bears repeating: Pinterest isn’t social media. It’s a content discovery platform. People aren’t there to chat with friends. They’re there to find things. They’re bookmarking ideas, saving recipes, planning renovations. This mindset makes Pinterest users highly receptive to clicking through to your blog, eager to consume the content they’ve just discovered. That user intent is gold for bloggers.
Getting Started: Setting Up Your Pinterest Account
Setting up your account correctly from the start is absolutely crucial. Don’t skip these steps. They lay the foundation for all your future success.
Create a New Pinterest Account or Convert an Existing One
My strong recommendation? Always create a new, dedicated Pinterest account for your blog. While converting a personal account seems convenient, it often muddies your brand and analytics. A fresh start ensures clarity and focus.
- Why a Separate Account for Your Blog is Recommended:
- Brand Consistency: Your profile reflects your blog’s aesthetic and message.
- Clear Analytics: All data relates directly to your blog content. No personal noise.
- Professionalism: It just looks more polished and professional.
- Steps to Create a New Account:
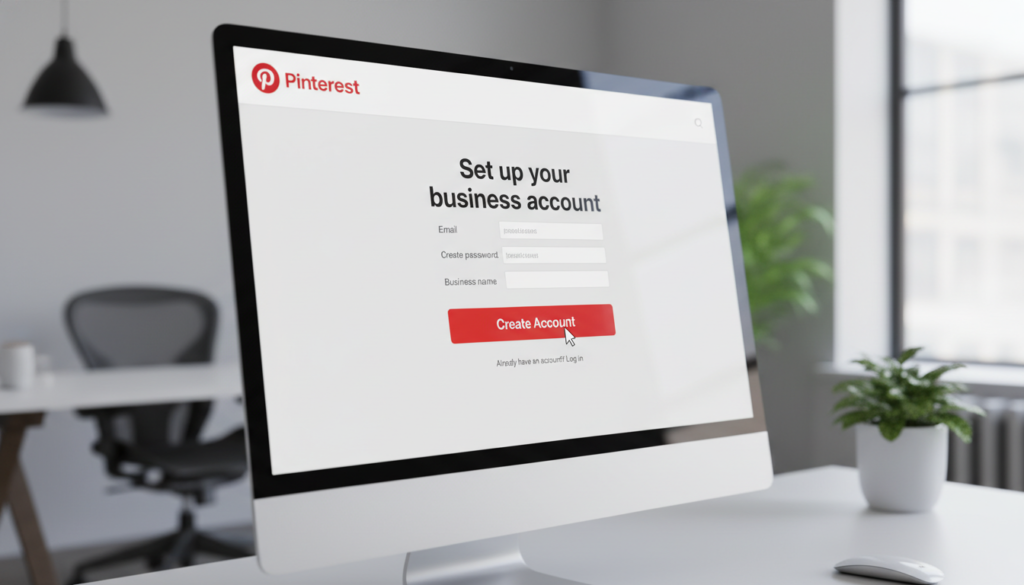
- Go to Pinterest.com and choose “Sign up.”
- Enter your email, create a password, and add your age.
- Follow the prompts to select your language, country, and interests (these help Pinterest understand your niche).
- You’ll initially create a personal account. Don’t worry, we’ll convert it in the next step.
- Converting a Personal Account to Business:
- Log into your personal Pinterest account.
- Click the down arrow in the top right corner.
- Select “Convert to business account” (or “Add a free business account” if you want to keep your personal separate).
- Follow the guided steps, providing your business name (your blog’s name), website URL, and business type.
Upgrade to a Free Pinterest Business Account
This isn’t optional. Seriously. Upgrading to a Pinterest Business Account costs you nothing but unlocks indispensable tools. This is a must-do, right away.
- Benefits of a Business Account (Analytics, Rich Pins, Ads):
- Pinterest Analytics: This is your control panel. You’ll see which pins perform best, what boards resonate, and crucial demographic data about your audience. Without it, you’re just guessing.
- Rich Pins: These add extra context to your pins from your blog post metadata, like article title, author, and description. They stand out and look far more professional, boosting click-through rates.
- Access to Ads: While optional, knowing you can promote pins later is a valuable asset.
- Step-by-Step Conversion Process:
- If you’ve just created a new account, go to
pinterest.com/business/create/. - Fill in your blog name, select your business type (likely “Blogger” or “Online Publisher”), and add your website URL.
- Pinterest will walk you through a few more details. It’s a very straightforward process.
- If you’ve just created a new account, go to
Claim Your Website
Claiming your blog on Pinterest is vital for two reasons: trust and data. It validates you as the owner of your content and gives you access to even deeper analytics for pins linked to your site.
- Importance of Claiming Your Blog:
- Enhanced Analytics: See how pins from your site perform, even if other people save them.
- Profile Visibility: Your profile picture will appear next to any pins saved from your claimed domain.
- Trust and Authority: It signals to Pinterest and users that you’re a legitimate source.
- How to Claim Your Website (WordPress, etc.):
- From your Pinterest Business Hub, go to “Settings” (the gear icon) and select “Claim.”
- Choose “Websites” and enter your blog’s URL.
- Pinterest will give you a piece of HTML code or an HTML file to upload.
- For WordPress users: The easiest method is usually to copy the HTML tag and paste it into your website’s header section. Many SEO plugins (like Rank Math or Yoast) have a dedicated spot for Pinterest verification code. Alternatively, you can upload the HTML file to your website’s root directory via FTP.
- Once added, go back to Pinterest and click “Verify.” It might take a few minutes for Pinterest to confirm.
Optimizing Your Pinterest Profile for Success
Your Pinterest profile is your blog’s storefront on the platform. Make it inviting, informative, and utterly optimized for search. This isn’t just about looking good; it’s about being found.
Craft a Keyword-Rich Profile Name and Bio
This is where your keyword research truly starts paying dividends. Don’t just put your blog name. Add keywords people are searching for! This is a core strategy I always recommend.
- Including Your Blog Name and Niche Keywords:
- Name: Instead of just “My Blog,” try “My Blog | [Your Niche] & [Another Niche].” For example, “The Savvy Homeowner | DIY & Budget Decor.” This immediately tells users what you’re about and helps Pinterest categorize you.
- Bio: Your bio isn’t just a friendly introduction; it’s prime SEO real estate. Use those precious 160 characters to describe what your blog offers, incorporating your main keywords naturally.
- Writing a Compelling Description:
- Think about the problems your blog solves. “I help busy moms find delicious, quick recipes” or “Discover actionable tips for passive income.”
- Make it clear and concise. What will someone gain by following you? This is absolutely essential.
- For a deeper dive into finding those perfect search terms, check out The Ultimate Guide to Keyword Research for Bloggers. You’ll need it for your boards and pins too.
Add a Professional Profile Picture
Consistency is key for branding. Use the same profile picture you use across your blog and other main platforms. This builds immediate recognition and trust. A clear, friendly headshot or your blog’s logo works best.
Link to Your Website and Other Social Profiles (Optional)
Your claimed website link will display prominently. That’s the most important one. Pinterest also allows you to link to other social profiles, but I typically advise keeping this minimal. The goal is to drive traffic to your blog, not necessarily other social channels. Focus the attention.
Structuring Your Pinterest Boards Strategically
Think of your Pinterest boards as organized folders for your blog’s content and related topics. They help users navigate your profile, but more importantly, they are crucial for Pinterest’s algorithm to understand your niche. A well-structured board strategy is non-negotiable.
Create Your “Best of Blog” Board
This is your flagship board. Every blogger needs one.
- Purpose and Naming Conventions:
- This board only contains pins leading back to your blog posts. It’s a curated showcase of your absolute best work.
- Name it something clear: “Best of [Your Blog Name],” “[Your Blog Name] Top Posts,” or “My Blog’s Best Recipes.” Make it immediately obvious.
- Featuring Your Own Content Exclusively:
- This board should be the first one visitors see on your profile. It’s your prime real estate. Fill it with high-quality pins linking directly to your core content.
Develop Niche-Specific Boards
Here’s where you categorize your content and build authority. You’ll create boards for all your blog’s major categories and sub-categories.
- Identifying Your Blog’s Core Topics:
- If you blog about “sustainable living,” you might have boards for “Eco-Friendly Home,” “Zero Waste Kitchen,” “Sustainable Fashion,” “DIY Cleaning Products.” Each should be a distinct category your audience would search for.
- Keyword Research for Board Names and Descriptions:
- Just like your profile, board names and descriptions are searchable. Use your The Ultimate Guide to Keyword Research for Bloggers knowledge here.
- Board Name: Use a primary keyword phrase (e.g., “Vegan Dessert Recipes”).
- Board Description: Write a 1-3 sentence description incorporating related long-tail keywords. What kind of pins will you find here? What problem does it solve?
- Adding Relevant Pins to Initial Boards:
- Don’t leave boards empty! Pin at least 5-10 high-quality, relevant pins to each new board immediately. These can be a mix of your own content (if you have it) and relevant, high-quality pins from other creators. This signals to Pinterest that the board is active and useful.
Organize and Feature Boards
Presentation matters. Make it easy for people to find what they’re looking for.
- Creating Engaging Board Covers (Optional):
- While not strictly necessary for SEO, custom board covers (usually branded with your colors and fonts) can make your profile look incredibly polished and professional. I often recommend this step once you have a good rhythm.
- Arranging Featured Boards for Visitors:
- Pinterest allows you to select which boards appear at the top of your profile. Choose your “Best of Blog” board and your most popular or important niche boards to feature. This guides new visitors immediately to your most valuable content.
Designing High-Converting Pinterest Pins
Your pins are the visual gateways to your blog. They need to be eye-catching, informative, and compelling enough to make someone stop scrolling and click. This is arguably the most creative and impactful part of your Pinterest strategy.
Understanding Pin Best Practices
There’s a science to great pins. Ignore these guidelines at your peril.
- Vertical Orientation and Aspect Ratios:
- This is non-negotiable. Pinterest is built for vertical content. The ideal aspect ratio is 2:3 (e.g., 1000×1500 pixels). Anything too wide gets cut off; anything too long performs poorly.
- High-Quality Imagery:
- Blurry, pixelated, or poorly lit images are click-killers. Use professional-looking, relevant images. They truly make all the difference.
- If you need high-quality images without a budget, check out Best Free Stock Photo Sites for Bloggers.
- Clear, Readable Text Overlays:
- Most Pinterest users scroll quickly. Your pin’s text overlay needs to grab attention and communicate the value instantly. Use large, legible fonts. Contrast between text and background is crucial.
- Branding (Colors, Fonts, Logo):
- Develop a consistent style. Use your blog’s brand colors and fonts. Include a small, non-obtrusive logo or blog URL on every pin. This builds brand recognition over time. People will start to recognize your pins before they even read them.
Tools for Pin Creation
You don’t need expensive software. Accessibility to design tools has never been better.
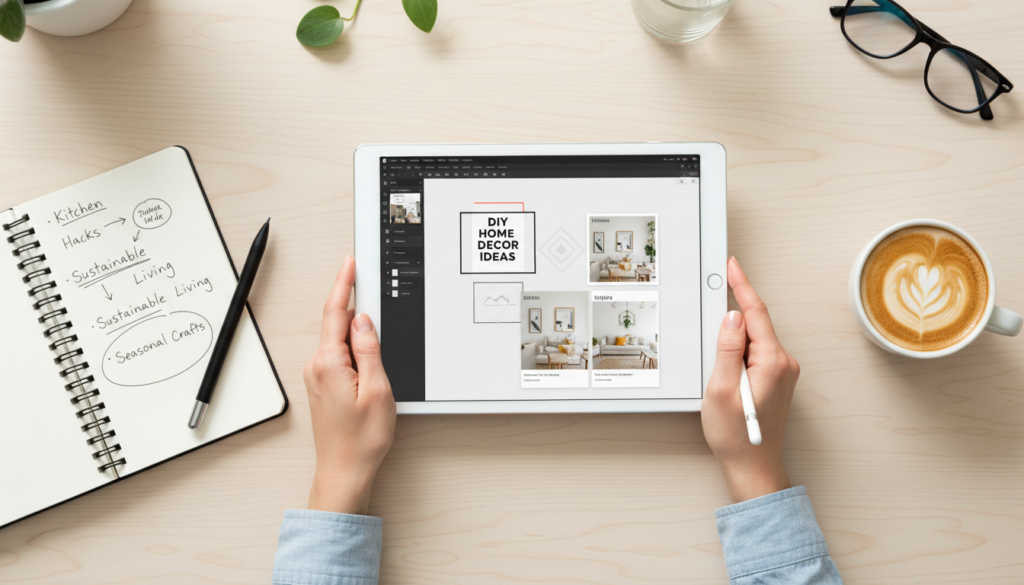
- Using Canva for Easy Design:
- I find Canva incredibly powerful for this. It’s intuitive, user-friendly, and offers fantastic templates specifically for Pinterest. You can quickly create professional-looking pins even if you have zero design experience. It’s my go-to recommendation for new bloggers.
- Other Graphic Design Tools:
- Adobe Express, PicMonkey, or even full Adobe Photoshop/Illustrator are options if you have more advanced design skills or specific needs. But for most, Canva is more than sufficient.
Crafting Compelling Pin Titles and Descriptions
The visual grabs attention; the text secures the click. Don’t underestimate the power of your words here.
- Incorporating Keywords Naturally:
- Your pin title and description are critical for Pinterest SEO. Include your main keywords and related phrases organically. Think about what a user would type into the search bar.
- Don’t keyword stuff. Pinterest is smart enough to detect it, and it looks spammy to users.
- Writing Click-Worthy Headlines:
- Focus on benefits, solutions, or intriguing questions. “10 Budget-Friendly Meal Prep Ideas” or “Stop Procrastinating: My 5-Step Productivity Hack.”
- Use power words. Create a sense of urgency or curiosity. This is where your copywriting skills really come into play.
- To ensure your content lives up to the promise of your pin, I strongly suggest reviewing How to Create Engaging Blog Content That Goes Viral. A great pin leads to great content.
- Including a Clear Call to Action:
- Tell people what to do: “Click to Read,” “Learn More,” “Get the Recipe.” A subtle prompt can significantly increase your click-through rate.
Creating and Publishing Your First Pins
Now for the exciting part: getting your blog content onto Pinterest. This process needs to be seamless, both for you and for the user.
Making Your Blog Content Pinnable
You need to ensure your blog posts are Pinterest-ready before you even think about pinning.
- Adding Pinnable Images to Blog Posts:
- Inside every blog post, I advise including at least one (preferably 2-3) vertical image that is specifically designed to be shared on Pinterest. Make it easy for readers to save directly from your post. Many bloggers keep these images hidden in their blog post content (using CSS) so they don’t visually clutter the page but are still available for pinning.
- Enabling Rich Pins for Enhanced Information:
- Remember those Rich Pins from the business account setup? Enable them! They pull metadata from your blog post, adding the title, author, and a snippet of the description directly to the pin. This makes your pins more informative and professional. Pinterest has a Rich Pin Validator tool you can use.
- Using Alt Text for Pin Descriptions:
- When you add images to your blog posts, use descriptive alt text. If someone pins your image directly from your blog, Pinterest often pulls this alt text as the default pin description. This is a subtle but powerful SEO tactic. So, make that alt text keyword-rich and descriptive!
Uploading Pins Directly to Pinterest
Once your blog is ready, creating the actual pin is straightforward.
- Step-by-Step Process for Creating a Pin:
- From your Pinterest profile, click the “+” icon (usually top right) and select “Create Pin.”
- Upload your beautifully designed vertical image.
- Add your compelling pin title (H1 from your blog post is a good start).
- Write your keyword-rich pin description.
- Crucially, add the direct URL to the specific blog post the pin links to.
- Choose the most relevant board for your pin.
- Linking Pins to Your Blog Posts:
- Double-check that every single pin you create links correctly to the specific blog post on your website. Broken links are a cardinal sin on Pinterest.
- Scheduling Pins for Consistency:
- Consistency wins on Pinterest. Instead of pinning sporadically, use Pinterest’s built-in scheduler or a third-party tool like Tailwind (my personal favorite for serious Pinterest users) to schedule pins consistently throughout the week. This keeps your content fresh and visible.
Developing a Pinterest Strategy for Growth
Simply putting pins out there isn’t enough. You need a deliberate strategy to see real growth and traffic. This involves a mix of consistency, curation, and analysis.
Pinning Frequency and Consistency
Pinterest rewards active users. I generally recommend aiming for a consistent pinning schedule, perhaps 5-10 pins per day, distributed throughout the day. This doesn’t mean creating 10 new pins daily; it means sharing a mix of your own new and old content, plus relevant third-party pins. Consistency signal to Pinterest that you’re a reliable source of content.
Curating Third-Party Content (Strategic Repinning)
You shouldn’t just pin your own stuff. A healthy Pinterest profile also curates high-quality, relevant content from others. Think of it as building your authority as a resource within your niche.
- The 80/20 Rule: A common guideline is to pin 80% third-party content and 20% your own. Or even 50/50. The exact ratio isn’t as critical as the principle: be a good community member and curate value.
- Strategic Repinning: Don’t just repin anything. Choose pins that align with your brand, are high-quality, and resonate with your audience. This helps fill out your boards and signals to Pinterest that your profile is an expert hub for your chosen topics.
Utilizing Pinterest Analytics
This is where you discover what’s actually working. Data removes the guesswork.
- Understanding Key Metrics:
- Impressions: How many times your pins were seen.
- Engagements: Clicks, close-ups, saves (re-pins).
- Pin Clicks: The holy grail – how many people clicked through to your blog.
- Audience Insights: Demographics, interests, and what else your audience is looking at.
- Identifying Top-Performing Pins and Boards:
- What images, headlines, and topics are getting the most clicks? Double down on those! Create more pins in that style or on similar topics.
- Which boards are driving the most traffic? Promote them more.
- Adjusting Your Strategy Based on Data:
- Pinterest Analytics isn’t just for looking. It’s for acting. If a certain pin style isn’t working, change it. If a board is underperforming, rethink its description or content. This continuous optimization is how you truly grow.
Exploring Pinterest Ads (Optional)
Once you have a solid organic strategy in place, and you understand your analytics, you might consider Pinterest Ads. They can amplify your reach and accelerate traffic, especially for specific products or lead magnets. However, I always recommend mastering organic first. Don’t throw money at something until you know what resonates.
Common Pinterest Mistakes to Avoid
I’ve seen these trip up too many bloggers. Learn from their missteps.
- Ignoring Keywords: Treating Pinterest like Instagram and skipping keyword optimization is a fast track to obscurity. Pinterest is a search engine!
- Inconsistent Pinning: Sporadic activity won’t build momentum. A consistent schedule is crucial.
- Poor Pin Design: Low-quality images, unreadable text, or non-vertical pins will get ignored.
- No Clear Call to Action: Don’t assume users know what to do. Guide them.
- Only Pinning Your Own Content: This makes your profile look self-serving and less valuable. Curate!
- Not Using a Business Account or Claiming Your Website: You’re flying blind without analytics and Rich Pins.
- Ignoring Analytics: Guessing is not a strategy. Let the data inform your decisions.
Conclusion: Pinterest for Long-Term Blog Traffic Growth
Pinterest is not a sprint; it’s a marathon. It demands patience and consistent effort, yes, but the payoff for bloggers is truly phenomenal. I’ve seen it time and again: when executed thoughtfully, a robust Pinterest strategy can deliver a steady, ever-growing stream of highly engaged traffic to your blog, month after month, year after year. It transforms your blog from a quiet corner of the internet into a bustling destination. So, get pinning. Your audience is waiting.