Pinterest. It’s a visual search engine, a boundless source of inspiration, and for creators and businesses, a truly powerful traffic driver. But let’s be honest, pinning consistently, strategically, and effectively can eat up hours. Hours I often don’t have. And that’s where my long-standing relationship with Tailwind comes in.
I’ve watched countless clients struggle with Pinterest, trying to manually keep up with the demands of its algorithm. They’re creating beautiful pins, yes, but often scheduling them haphazardly. Or, worse, they burn out entirely. I understand that frustration. My analysis has consistently shown that consistency, reach, and the ability to schedule pins at optimal times are paramount for Pinterest success. Tailwind, in my expert opinion, isn’t just a convenience; it’s an essential strategic partner. It’s what allows you to save precious time, maintain a consistent presence, and ultimately, amplify your reach without losing your mind. This guide is for you, whether you’re a blogger, a small business owner, or any content creator eager to master Pinterest without the daily grind.
Getting Started with Tailwind for Pinterest
Jumping into any new tool can feel daunting, but Tailwind makes its onboarding impressively smooth. Trust me, I’ve seen enough complex dashboards to appreciate simplicity. The first steps are straightforward, designed to get you up and running without a hitch.
Signing Up for a Tailwind Account
Your journey begins here. Navigate to the Tailwind website. You’ll see options to sign up, usually with your Pinterest or Instagram account. I always recommend using your Pinterest account directly. It streamlines the connection process.
Click “Sign Up with Pinterest.” Tailwind will then ask for authorization to access your Pinterest account. Don’t fret. This is a standard security protocol, allowing Tailwind to post pins on your behalf and access your analytics. They need this access to do their job, and I’ve found their security practices to be robust. Once you grant permission, you’ll be guided through a few quick setup questions about your business and goals. This helps Tailwind tailor your initial experience. A few clicks, and you’re in. Simple.
Installing the Tailwind Browser Extension
This next step? Absolutely critical. If there’s one feature I insist every Tailwind user installs immediately, it’s the browser extension. It’s your secret weapon for efficient content curation. I primarily use Chrome, but it’s available for Firefox and Safari too.
Head to the Tailwind dashboard, and you’ll usually find a prompt to install the extension, or you can search for “Tailwind Browser Extension” in your browser’s app store. Once you add it, a small Tailwind icon will appear in your browser’s toolbar. Click it and log in if prompted. Now, when you’re browsing your own blog, another website, or even Pinterest itself, you can instantly grab images and schedule them. It transforms content discovery into a scheduling opportunity. I find this indispensable for maintaining a full queue.
Mastering Your Tailwind Smart Schedule
This is where Tailwind truly shines. It isn’t just a scheduler; it’s a smart scheduler. I tell clients all the time, guessing your best posting times is a losing game. Tailwind eliminates the guesswork.
Understanding the Smart Schedule
Imagine an AI analyzing millions of data points to figure out exactly when your audience on Pinterest is most active and engaged. That’s Tailwind’s Smart Schedule at work. I’ve seen its power firsthand. It’s not just about when you want to post; it’s about when your audience is ready to see your content. Tailwind generates a personalized schedule for your account, built on optimal engagement times for your specific niche and followers.
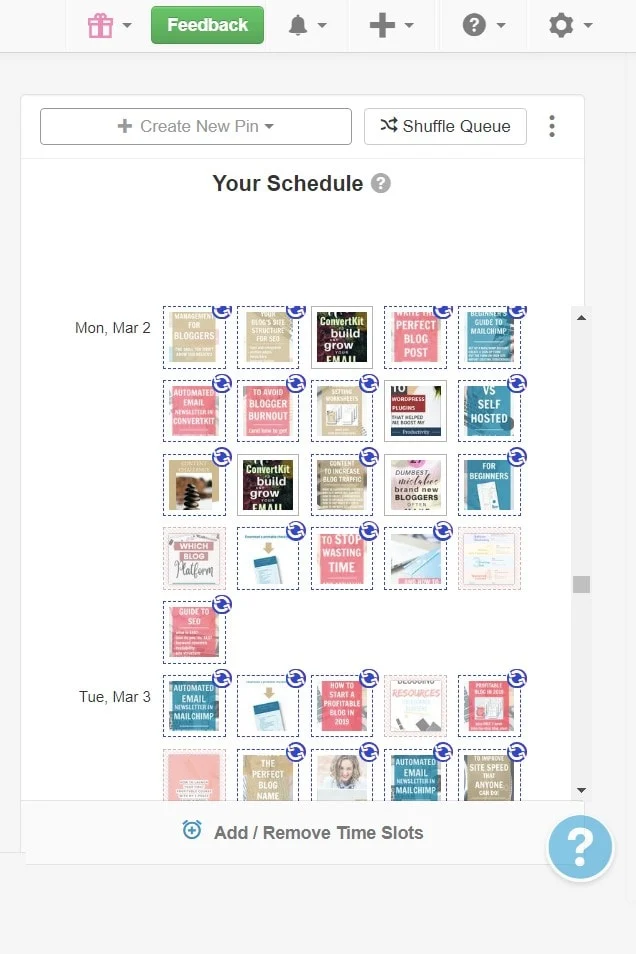
When you first log into your dashboard, navigate to the “Publisher” section, then “Your Schedule.” You’ll see a grid of green slots. These represent the times Tailwind has identified as prime opportunities for your pins to perform. It’s a beautiful thing.
Customizing Your Schedule
While the Smart Schedule is brilliant, you still have control. I love this flexibility. Sometimes, I have specific campaign needs, or perhaps I want to test a new theory. You can easily add more time slots if you feel you need to increase your pinning frequency. Just click on an empty spot in the schedule grid. A new green slot appears. You can also delete existing slots if you want to reduce your pinning volume, or if a particular time slot consistently underperforms for you. Just click the slot and hit the delete button. Tailwind’s goal is to optimize your success, and that includes giving you the reins when needed. Adjusting the frequency allows for more, or fewer, pins to go out each day, all within those optimized windows.
Creating and Scheduling Pins with Tailwind
This is the heart of your Pinterest strategy with Tailwind. The platform offers several pathways to get your content onto Pinterest, each designed for maximum efficiency. I personally use all these methods, depending on the type of content I’m scheduling.
Pinning from Your Website/Blog
This is perhaps the most frequent use case for me. When I publish a new blog post or update a page on a client’s site, the first thing I do is head over to that page with the Tailwind browser extension active.
Here’s my process:
- Activate the Extension: Click the Tailwind icon in your browser toolbar, or simply hover over an image on your page. A Tailwind icon often appears directly on the image.
- Select Images: The extension will display all pinnable images from that page. Pick the ones you want to use. I often select multiple, knowing I can create several distinct pins for the same content.
- Craft Descriptions and Titles: This is paramount. Don’t just auto-fill. Tailwind will pull information from your page, but I always refine the pin description and title. Think SEO here! What keywords would someone search for on Pinterest to find this content? What problem does this pin solve?
- Destination URL: Ensure the URL is correct. This is where your pin will lead.
- Add to Drafts or Schedule: You have two powerful options. You can “Add to Drafts” if you want to refine things later or group them with other pins. Or, if you’re ready, hit “Add to Queue” to send it straight into your Smart Schedule. I typically use “Drafts” if I’m batching content creation and “Add to Queue” if it’s a fresh piece ready to go.
Pinning from Pinterest Itself
Repinning relevant content from other creators is a core part of a healthy Pinterest strategy. Tailwind makes this remarkably easy and efficient. When I’m browsing Pinterest for inspiration or to curate content for a client, I use the extension again.
- Hover and Pin: As you hover over pins on Pinterest, the Tailwind icon will appear. Click it.
- Bulk Select: This is a fantastic time-saver. If you’re scrolling through a board and see a dozen great pins you want to repin, simply click the Tailwind icon on each one. They accumulate in a small pop-up window.
- Schedule Away: Once you’ve selected your pins, review their descriptions and destination URLs (adjust if needed, though often repins are fine as is), choose the boards you want to pin them to, and add them to your queue. Tailwind will then smartly space them out according to your schedule, preventing a spammy flurry of repins.
Utilizing Tailwind Create for Pin Design
Honestly, Tailwind Create is a game-changer for anyone who isn’t a graphic designer (or who just wants to save a lot of time). I frequently recommend it to clients who struggle with consistent pin design. It helps you design beautiful, on-brand pins in minutes.
- Batch Designing: The magic here is turning one piece of content into multiple distinct pins. You provide a URL (your blog post, product page, etc.) or upload an image.
- Brand Kits: Before you start, set up your brand kit. This means defining your fonts, brand colors, and uploading your logo. Tailwind Create will then automatically apply these to your designs, ensuring everything stays perfectly on brand. I love this feature because it enforces visual consistency effortlessly.
- Generate Variations: Tailwind Create will then instantly generate dozens of pin variations, pulling images and text from your URL. You can cycle through different templates, adjust layouts, swap images, and tweak text. Select the ones you like best, edit them further if needed, and send them directly to your Tailwind drafts or queue. This significantly reduces the time spent on pin design.
Leveraging Tailwind Ghostwriter for Pin Descriptions
The latest evolution, Tailwind Ghostwriter, leverages AI to assist with generating optimized pin titles and descriptions. I’ve found it to be an excellent starting point, especially when facing writer’s block.
Ghostwriter lives right within the pin creation interface. As you’re adding a new pin, you can click a button to have the AI suggest titles and descriptions based on your pin image and destination URL. It’s surprisingly good at pulling out key phrases and crafting engaging copy.
However, I always advise users to treat these AI-generated suggestions as a strong draft, not a final product. Refine them. Inject your unique voice. Add specific keywords you know perform well for your niche. The AI provides the bones; you provide the soul. It’s a powerful tool to speed up the process, but human oversight remains crucial for authenticity and ultimate optimization.
Advanced Tailwind Features for Pinterest Growth
Once you’ve mastered the basics, it’s time to dig into the features that truly accelerate your Pinterest growth. These aren’t just add-ons; they’re strategic tools I consistently use to refine and expand reach.
Organizing with Board Lists
Board Lists are a lifesaver for me when managing multiple niches or content categories. Instead of manually selecting boards for every single pin, you group relevant boards together.
- Create Lists: Go to your Tailwind dashboard, find “Board Lists” under “Publisher.” Here, you can create lists like “Blogging Tips Boards,” “Healthy Recipes Boards,” or “Home Decor Inspiration.”
- Add Boards: Populate these lists with your own Pinterest boards and any relevant group boards you’re a part of.
- Efficient Scheduling: Now, when you schedule a pin, instead of clicking 10 individual boards, you simply select your “Blogging Tips Boards” list. Tailwind will then pin that content to each board in the list, smartly spreading it out over your schedule. This prevents simultaneous posting to multiple boards, which Pinterest dislikes. It’s an incredibly efficient way to ensure your content reaches diverse audiences without repetitive manual effort.
Engaging with Tailwind Communities (formerly Tribes)
Tailwind Communities (you might still hear them called Tribes, their old name) are collaborative groups where creators share and repin each other’s content. They are, in my opinion, one of the most powerful organic reach tools available within Tailwind.
- Benefits: By joining relevant Communities, you expose your pins to a new audience of fellow creators and their followers. In return, you’ll discover high-quality content to share with your own audience, keeping your boards fresh and active. It’s a reciprocal ecosystem.
- Finding and Joining: In your dashboard, go to “Communities.” You can search for communities by keyword, niche, or category. Look for active, engaged groups with clear rules.
- Best Practices: This is vital. Don’t just dump your pins and run. The unspoken rule is “give more than you take.” For every pin you add to a Community, try to repin at least one or two others. Engage. Share quality content. This builds goodwill and makes your contributions more likely to be repinned. I’ve seen Communities dramatically increase early pin visibility.
Analyzing Your Performance with Tailwind Analytics
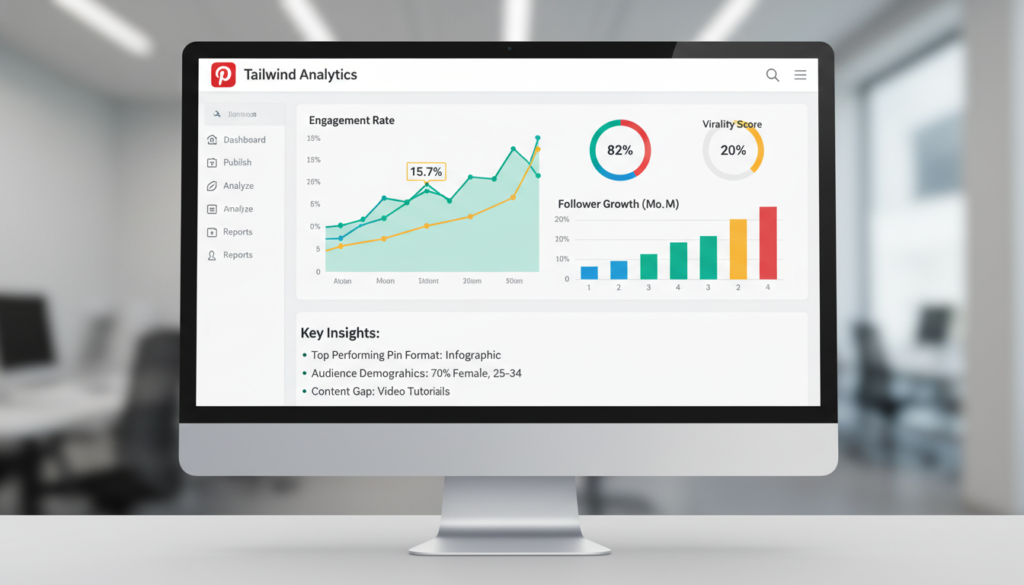
Data is your friend. Blindly pinning without understanding what works is a waste of effort. Tailwind Analytics provides the insights you need to refine your Pinterest strategy.
- Key Metrics: Head to the “Analytics” section. You’ll find a wealth of information:
- Pin Performance: See which of your pins are getting the most repins, clicks, and impressions. This tells you what content resonates.
- Board Performance: Which of your boards are driving the most engagement? This helps you prioritize.
- Referral Traffic: Crucially, Tailwind shows you how much traffic Pinterest is sending to your website. This is the ultimate metric for many of us.
- Refining Strategy: I pore over these stats. If a certain pin design consistently outperforms others, I create more like it. If a specific topic gets high engagement, I produce more content on that subject. The data empowers you to make informed decisions, ensuring your efforts are always optimized for growth. Without this data, you’re just guessing.
Workflow Optimization: Scheduling Pins in Less Time
The real beauty of Tailwind, beyond the individual features, is how it allows for a highly optimized workflow. My personal secret to consistent Pinterest growth? Batching.
Batching your pin creation and scheduling tasks means setting aside a dedicated block of time—say, once a week or twice a month—to handle all your Pinterest work. During this time, I’ll design pins in Tailwind Create, write descriptions (using Ghostwriter as a kickstart), curate content from other sources, and load my queue.
Then, there’s the “Shuffle Queue” feature. It’s brilliant. If you’ve loaded a bunch of pins into your queue all at once, they might appear clumped together in your schedule. Shuffling mixes them up, ensuring a varied distribution throughout your optimal time slots. This prevents your audience from seeing too many similar pins from you back-to-back. The goal is consistent pinning without daily effort. Load it up, shuffle it, and then step away. Tailwind handles the rest. This strategy frees up significant mental bandwidth, allowing you to focus on other aspects of your business.
Troubleshooting Common Tailwind Issues
Even the best tools can have their quirks. I’ve encountered a few common hiccups over the years, and usually, the fixes are quite simple.
- Pin not scheduling? Double-check that your Pinterest account is still connected properly in your Tailwind settings. Sometimes API tokens expire. Reconnecting usually resolves it.
- Browser extension not working? Try restarting your browser, or even uninstalling and reinstalling the extension. Ensure your browser is updated.
- Analytics not updating? Data sometimes takes a bit of time to refresh. Give it 24-48 hours. If it persists, check Tailwind’s status page for any reported outages.
- Confused by a feature? Honestly, Tailwind’s support documentation is incredibly thorough. I always direct users there first. They have comprehensive guides and FAQs for nearly every scenario. If that doesn’t work, their customer support team is responsive and helpful.
Conclusion: Maximizing Your Pinterest Presence with Tailwind
Using Tailwind for Pinterest isn’t just about automation; it’s about strategic efficiency. I’m convinced it’s the single most impactful tool for anyone serious about leveraging Pinterest for traffic, leads, and sales. It liberates you from the monotonous daily grind, allowing you to focus on creating fantastic content, while ensuring your beautifully designed pins consistently reach the right audience at the right time.
Embrace the Smart Schedule, lean into the power of Communities, and use the analytics to continually refine your approach. Pinterest is a dynamic platform, always evolving, and Tailwind evolves with it. Your commitment to consistent learning and adaptation, coupled with Tailwind’s robust feature set, will undoubtedly lead to a stronger, more impactful Pinterest presence. So, dive in. Start pinning smarter, not harder. You’ll thank yourself later.